
Sol
Evenings Sol
Updated
Evenings Sol is the most portable standalone tool for broadcasting and recording studio-quality audio from any source. This guide explains how to set up and use Sol.
This document is still being updated. If you have any questions or concerns, email contact@evenings.email.
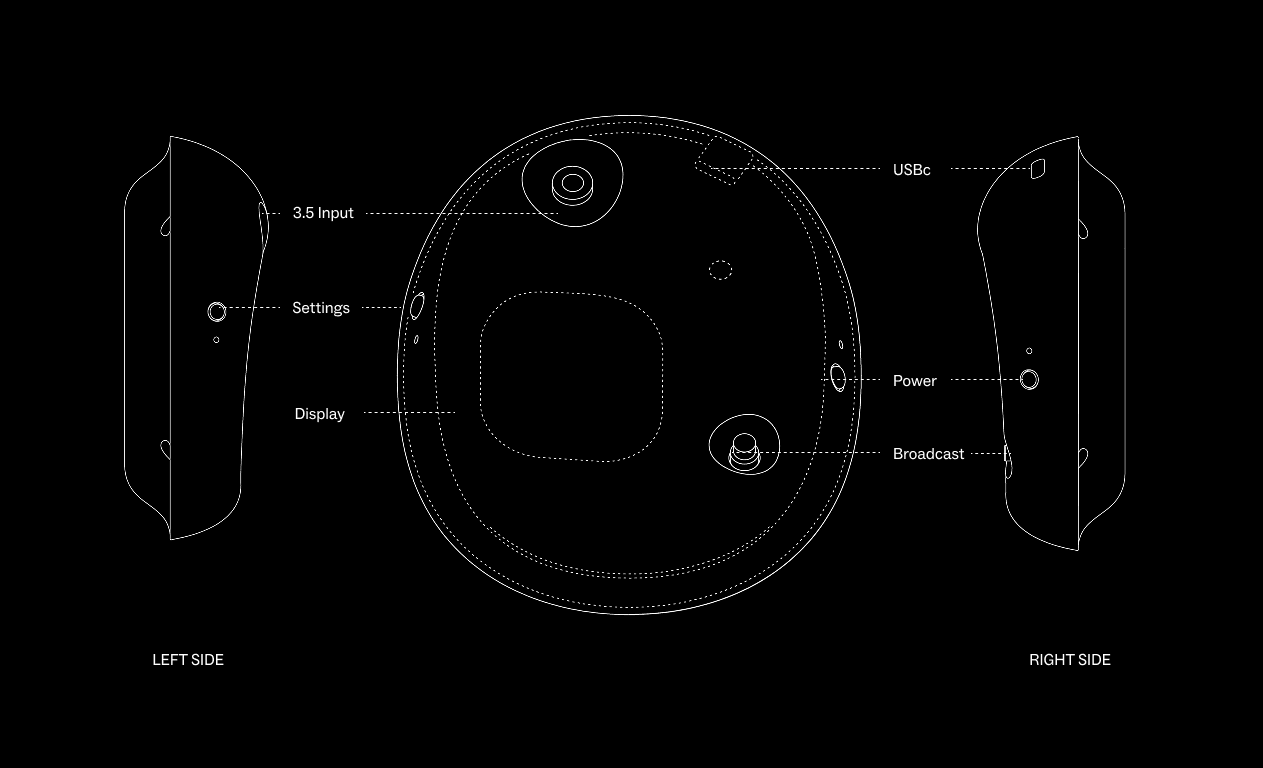
Device overview
- Broadcast button — the only button on the top face. Records offline, or livestreams and records once Sol is on WiFi.
- Power button — on the right side of the device.
- USB-C — charging, and access to your recordings from a computer.
- 3.5mm input — plug in your audio source.
- Display — 2.88in LCD showing the device name and status (
SOL-XXXX,CONNECT ACCOUNT,READY). - Settings — on the left side of the device.
Setup
Start the device
- Press the power button on the right side of the device to turn it on.
- Wait a second...
Record offline
- Press the only button on the top face of the device to record offline. When you connect the device to WiFi, the same button becomes the livestream and record button — this will be relevant in a later step.
- Connect the device to your computer with a USB-C cable to access the recordings on the device.
- You can also browse and listen to your recordings from a web page on your phone — see the sol.local app below.
Going live
Connect Sol to WiFi
- Once Sol finishes booting up you'll see the name of the device on the display:
SOL-followed by a 4-digit code. - Go to your WiFi network settings on a phone or computer and select the
SOL-(4 digit code)network. - When prompted, enter the password
12345678. You'll only ever need to do this once. - Once you're connected to the Sol network, open
http://sol-(4 digit code).localin your browser — for examplehttp://sol-AD5P.local. Make sure to usehttp://in the URL and nothttps://. - On the sol.local page, select the WiFi network you want to connect the device to and enter its password.
- Once the device is connected to WiFi, the screen on Sol will say CONNECT ACCOUNT.
Connect your Evenings account
- Now connect the device to your Evenings account from the sol.local page.
- Once Sol says READY on the display, you're ready to go live. Press the button on the top face to start broadcasting to your station.
Once Sol is connected to WiFi you'll be able to open the sol.local page at any time to view the recordings on the device, without plugging it into your computer with a cable.
Specifications
| Spec | Detail |
|---|---|
| Dimensions | 6in × 4.5in × 1.5in |
| Weight | 4.8 oz |
| Battery life | 3 hours |
| Storage | 22.5 GB |
| Display | 2.88in LCD |
| WiFi | WiFi (802.11) |
The sol.local app
Every Sol serves a small web app on your local network at http://sol-(4 digit code).local. Open it from any phone or computer on the same WiFi network to manage the device. It has three tabs.
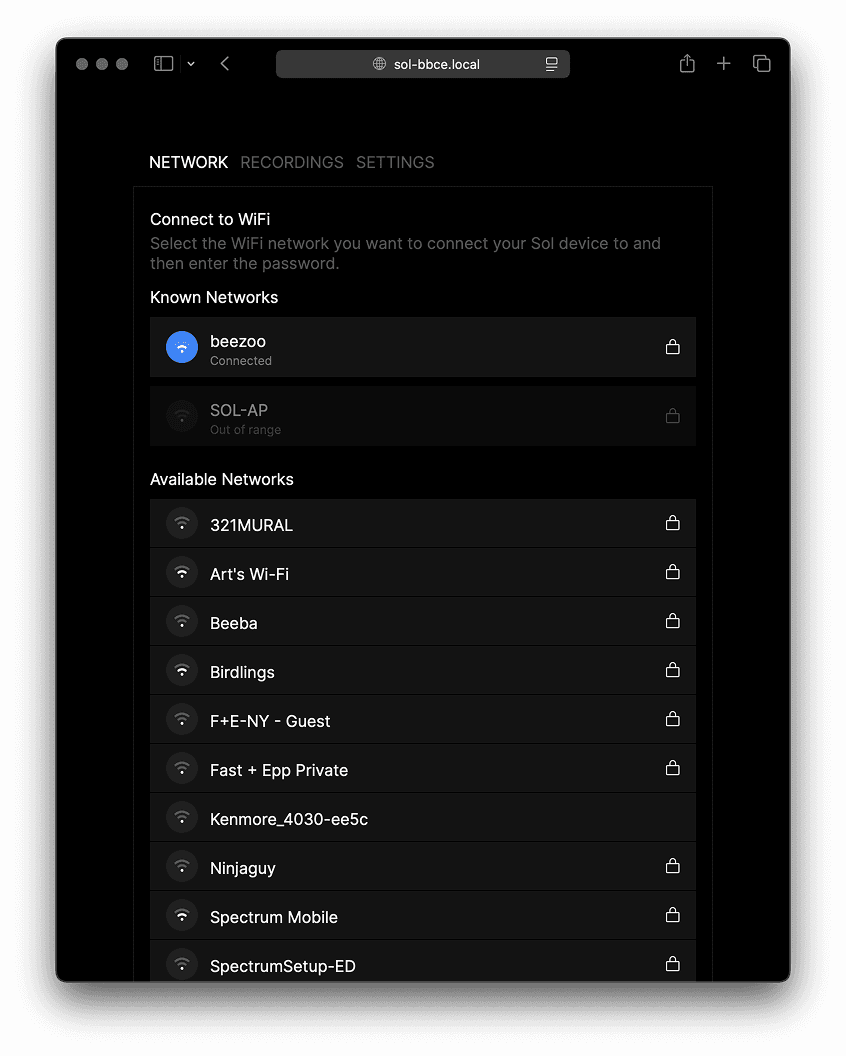
Network
Connect Sol to WiFi. Known networks are listed at the top with their connection status, followed by the available networks in range.
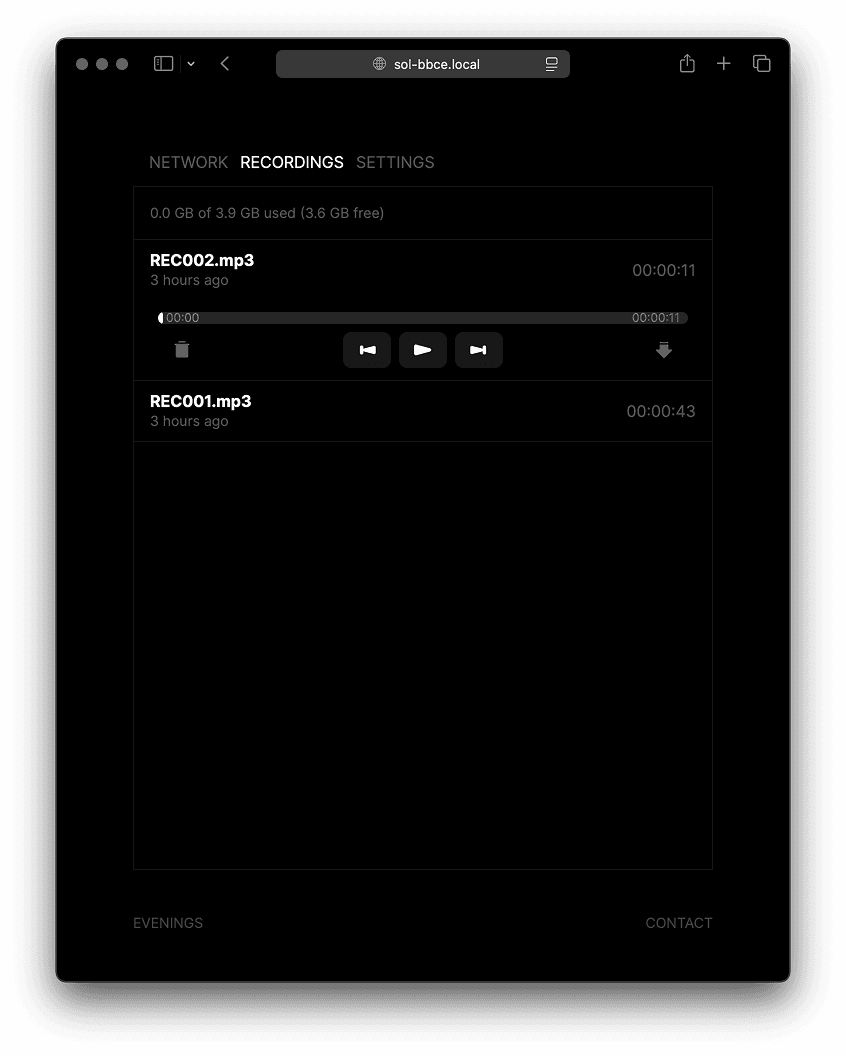
Recordings
Browse the recordings stored on the device. The storage used is shown at the top, and each recording can be played back, downloaded, or deleted directly from the page.
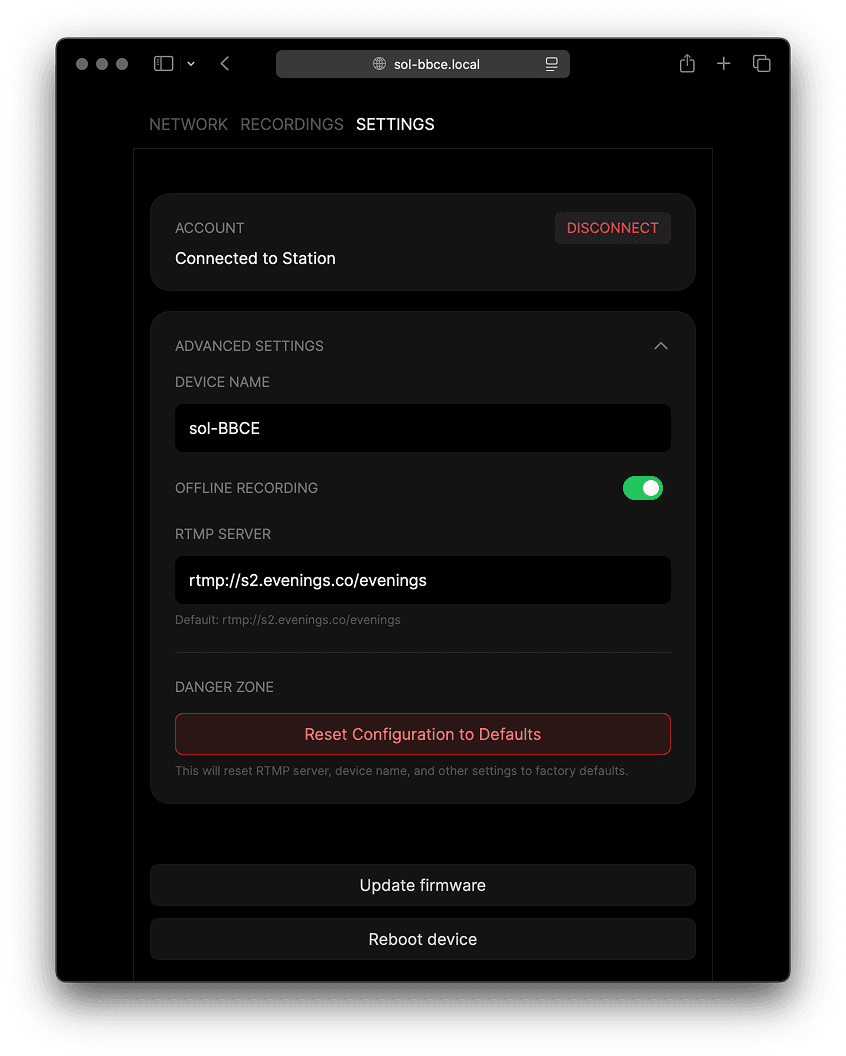
Settings
- Account — shows which Evenings station the device is connected to, with a disconnect option.
- Advanced settings — the device name, an offline recording toggle, and the RTMP server Sol streams to (default
rtmp://s2.evenings.co/evenings). - Danger zone — reset the configuration to factory defaults.
- Update firmware and Reboot device.
More documentation coming soon. Email contact@evenings.email with questions.